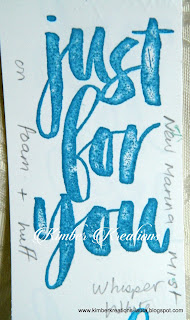
I have to say I have had more than a little trouble getting a good solid image with this large greeting stamp. (I have the wood mount version of this set.)
I know I am not the only person to have a problem with this stamp.
So today I decided to experiment with ink pads and card stocks to see if I could get a better image.
Well, the short answer is yes I did manage to get a good clear solid image eventually, but it wasn't easy.
I tried my normal ink pads, which generally work perfectly well and found they were no good for this stamp. So they had to be re inked before my second attempt at stamping with them.
 So then I tried the new style stampin' up ink pads as they release more ink onto the stamp, therefore giving better coverage.
I was a disappointed to find a couple of new pads were still too dry for this stamp. I tried using a foam pad under my card stock before stamping the second image and still got a poor result.

I tried another more juicy ink pad and again I used the foam pad under the card stock. Although I got a better result this time, there were till areas that didn't stamp.
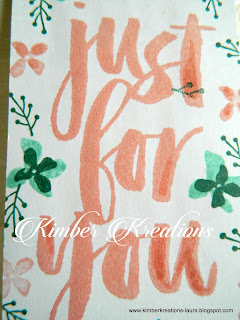
I tried to touch up the missed areas with the matching marker pen. As you can see the marker pen shows up a lot.

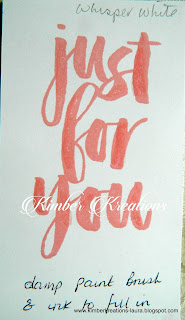
So I stamped it again using the same ink pad and foam, again there were misses but this time I touched up the missed areas with an aqua painter and a little ink. The result was much better, but still not quite good enough for my liking
My next step was to sand the stamp lightly with a fine grade sandpaper and try again.
This time I stamped the imaged with a brand new, unopened, and much juicier ink pad and without foam pad under the card stock.
The result was better, but still not perfect.

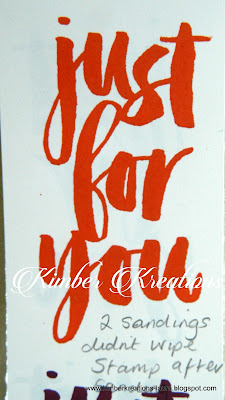
I then decided to give the stamp another sanding, this time a little harder and mainly working on the thick downward strokes of each letter. As these are the areas of the stamp that are giving me most grief.
This time it produced a pretty good, solid image one that I would be happy use on a card.
I also tried stamping this image on three different white card stocks.
 Photocopier card, I sometimes use this for stamping and usually get reasonable results but for this, the results were very poor.
 I tried chameleon card stock, which I use to stamp images on that I want to colour with alcohol markers. The results were not good.
Then I used my favourite card to stamp on, Whisper white card stock from S.U.
My Conclusion, in my opinion the best way to get a decent bold, sold image with this stamp is to sand the stamp well, especially the thick, downward strokes of the letters.
Use a foam pad or old mouse mat under your card stock.
Use a very juicy ink pad to ink up the stamp, use enough ink on to form tiny beads of ink evenly over the stamp.
But beware of putting too much on and creating pools of ink.
My final tip is to press the inked stamp onto the card firmly and hold it in position for around 10-15 seconds to give the paper time to absorb the ink from the stamp.
If all this doesn't work for you,....... give up and throw the stamp away and make a cup of coffee.
No, seriously you could always resort to heat embossing it instead.
I have to say in my six years with Stampin' up, this is the first stamp I have ever had a problem with.

