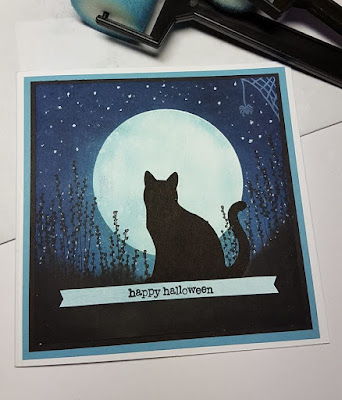
Saturday 4 November 2017

Acrylic Block Stamping.


After creating and sharing this card on social media I was asked to do a tutorial on this technique, so this is for you Sarah  Hardy.

I find this technique to be a little hit and miss at the best of times, but in the main most pieces can be used for something.
Choose three colours of ink pad, I like the colours in the  photo best for this technique. Earthy colours seem to look best. Starting with the lightest colour, dab it onto one end of an acrylic block, repeat this with the next two colours.  You will also need some water colour paper for this technique.


I recommend starting with the lightest colour so you do not contaminate your light colour ink pad with the darker ink as you dab the pads on the block. lighter colour will not affect your darker ink pads.


Spritz the inked up block with  a fine misting of water 2 or 3 squirts is usually enough, but a lot depends on how fine the mist is from your bottle.
You don't want your block so wet that all ink water runs off as you turn it over.


                                            You will need some  water colour paper to stamp on for best results, although I have previously tried this technique on a heavy cartridge paper with limited success.
Once you have misted  your block flip it over and lay it on the water colour paper. Press the block down gently to spread the ink /water mix underneath.


Don't press too hard or it will ooze out the sides.  If you're lucky  and get good coverage, you will be able to remove the acrylic block and allow it to dry before stamping over it.

If you're not so lucky you could try the following to avoid or filling in those dry patches.
Spritz the water colour paper with water and wipe off the excess water with kitchen tissue before stamping with the block.


Another thing I do to improve the coverage is to  lift the opposite end of the block to the dry patches very slowly until a puddle forms at the other end, but  do not take the block off the paper completely. 


If necessary, I will lay the block back down and then lift the opposite end of the block until the puddle forms at the opposite end.


 Once I am happy with the coverage and with some kitchen roll in hand,  I lift the block off and mop up the excess moisture from the block and the puddle left on the card stock.


When the card has dried out  you can then stamp over with the images of your choice. My favourite stamp set to use with this technique is the retired Happy Scenes stamp set.
The trees are a perfect for the size blocks I stamp with.


To finish  I apply a little glue using the two way glue pen and sprinkle with white glitter. Then  bush off the excess glitter with a soft brush.


Too much glitter  can over power these little scenes, so it's important you only apply the tiniest amounts of glitter.


If you find you have too much glitter on your project, you can remove it using an adhesive remover.


All that's left to do now is turn your image into a card. I like to keep the card clean and simple so as not to distract from the focal point.
For me that means  mounting the image onto some dark card with a very narrow border  then adhered to either a white of cream base card with a simple sentiment


Sitting here.

Everyone knows I am not a fan of polymer stamps, but I couldn't resist this set  and so far I have had success using it.
It takes patience and some planning to get a good result, place those cushions too far apart and they wont fit on the swing.

I used the floral stamp from Awesomely Artistic to give the impression of a garden setting.

Bauble card

Another retired Christmas Stamp  from the Ornament  Keepsake set and die cut with the coordinating die.
The sentiment is from a set called  Greetings of the Season.

Bauble Christmas card

 A simple background was created by using a suitable stamp and white craft ink pad.
 I used a wheel stamp that I cannot remember the name of and the bauble stamp is from a set called  Merry and Type.
Both the wheel stamp and  Merry and Type are retired.

Christmas Card

The embossing folder used for the background is called gently falling from S.U.
The Sentiment is from the set called Carols of Christmas, new this year.

This one was a little out of my comfort zone. I don't usually  work with large sentiment stamps so I had trouble deciding on shape and size of card, then what on earth I was going to put with it.
Some banner strips and some fussy cut holly was all I could come up with.

Embroidered Christmas card.

During my craft room clean up, I found this piece of embroidery I did some years ago. Rather than throw it out, I decided to turn it into a  Christmas card.

I heat embossed a sentiment in silver beneath the embroidered image.

Here is the finished result.

Before you ask... I don't have the patience or the time or skills to embroider this image by hand.
So the credit should go to my sewing machine.

Glittery crafty cards.


The image on these two cards is in the Crafting forever stamp set from Stampin' Up.


The very sparkly backgrounds for these images was created by applying embossing paste over a brass stencil on card stock and then applying glitter over the  paste pattern that's left on the card stock and then left to dry.


It's  a messy business and requires more time and  cleaning up than  some with other techniques, so I don't use this technique very often.
I wish the photo would show just how sparkly this green glittered card really is.

I used a different brand of glitter on the pink card, it's nowhere near as sparkly as the green one, but still effective,


Wishing Well Card

I love this wishing well stamp and the sentiment stamps that come with this image from Stampin' up.
 I am not really sure how much use I will get out of this set but but it is such a pretty stamp that I couldn't resist buying it.

Coloured with Copic markers and mounted onto Berry burst and DSP card stock.
Card size 7 X 5.

Teddy New Years card.

I have had a bit of a clear out of my craft room over the half term holiday.
During my sorting I came across this  photocopied image. It's signed with my maiden name, meaning I drew this a very long time ago, way before I discovered stamping.
I remember,  I drew a series of these bear images and photocopied them onto vanilla card stock, so I could water colour the images without having the ink run and because I wanted to make more than one of each image without actually having to re draw the images.
 When I found this  uncoloured image I just had to try colouring it with my Copic markers, even though the card stock isn't ideal for use with alcohol markers it didn't turn out too bad. The cable knit embossed background makes it look better.

Celebrating Friendship.

 A very quick and simple card using two stamps from  Crafting Forever stamp set.

I used Berry Burst and Marina Mist card stock for the layers and banner strips along with a little DSP in black for contrast.

Chameleon Card

I dragged out some old retired S.U. stamp sets for this card... The friendship wheel stamp and white craft ink were used to create the wordy  background strip, which was then stitched to a layer of vanilla card stock using a zigzag stitch.

The card stock used was S.U. Elegant Eggplant, although in this photo it looks more like the retired Concorde Crush and in another photo it looks  like Night of Navy, so I am calling this a my Chameleon  card.
The Sentiment stamp is from the stamp set called  "From my heart" and stamped onto vanilla card stock in Elegant  Eggplant  ink.

Exam good luck card.

This image from Lilli of the Valley would make a great card for any female studying for an exam. This one will probably go to a young lady who will be doing her SATs next May.

I used the new  Berry Burst card stock from S.U and die cut two holes into the card front and adhered it to the front of of my base card.  The sentiment and image were die cut using the same dies used to cut the holes.  Then I just popped them into the holes in the Berry Burst card stock....with a little adhesive on the back of course.

Friday 13 October 2017

Cat cards

 I created this  card in red and orange yesterday so today I thought I'd try different colours today.  I rather like the purple one best.
For this effect I cut a large circle in a post it not and placed the negative where I wanted my Moon to be.  Using the splatter stamp from Gorgeous Grunge stamp set and versamark ink I stamped over the aperture several times and allowed the ink to dry.
Once dry I lightly sponged over the moon area with my lightest purple ink. Almost Amethyst.  Then I removed the negative mask and placed the positive mask over the sponged moon to prevent it getting  any darker or mucky.

Using  sponge brayers  and  Almost Amethyst ink I sponged over the top two thirds of my card stock until the white card was  evenly covered.  Using a sponge dauber and  Concorde Crush ink pad,  I  worked the darker purple all around the edges of the card and bringing it in towards the moon, but not all the way, You still want some of the lighter purple showing around the moon and along the horizon.
With a sponge dauber and Memento black ink I filled in the bottom third of the card to create an  uneven  horizon. I kept adding ink until the card was saturated with black ink. I didn't want it to dry patchy.
 I  then stamped some foliage along the horizon  and in the top corner using the same black ink.
It's important to allow the card to dry out at this stage. Once dry I stuck on the punched out cat and added a sentiment that overlapped  the base of the cat to prevent the cat from looking like it had just been plonked on.

With a white gel pen I started adding highlights to the edges of the leaves and adding stars to the sky. If the sky is not completely dry the gel pen will not work very well.
The blue car was done in exactly the same way, but I used Marina Mist and Night of Navy ink pads.


Thursday 12 October 2017

Christmas in the making.


I fell in love with the stamp set this image came from. It's called Christmas in the making and it's available from Stampin' up until the end of the year when the autumn/ winter catalogue ends.


My stamp set only arrived yesterday and this is the result of my first play with it.


Coloured with Copic markers and with a little glitter added for sparkle.

Thanks for Dinner.

This is the perfect card to send as a Thank You  for a wonderful meal.

I should be sending one of these too my brother in law every time we  go over there for a meal.

He always cooks us a wonderful meal, his Beef wellington is to die for.

These stamps are from a retired S.U. set called compliments to the chef.
I added touches of pale greys to colour the image and layered the image on black card stock  then onto a white base card for a crisp, clean card.


Wednesday 11 October 2017

Wintery Christmas card.

A cute wintery  Lili of the valley image for this card.  The background was stamped using white craft ink.

Christmas Mice.


I have had these Crafter's Companion mice stamps for many years and they are one of my  favourite sets for Christmas.

They are all individual stamps so they can be positioned as close or as far apart as you wish. I like them huddled together,  so that means  there is a bit of masking  to do.

I coloured the images with Copic markers. once the ink was dry,  I stamped over the sky area with white craft ink.


Halloween card.

Love this new cat punch from S.U this autumn.
Perfect for a Halloween card, if you're into that kind if thing.
I personally am not a fan of Halloween and it's traditions.
But this cat silhouette  was crying out for this type of card.

I sponged the sunset using the sponge brayers S.U sell and Summer Sun, Pumpkin Pie and Real Red ink pads.

The bats are from a retired stamp set called "Wicked Cool" by S.U.
The foliage is from another  stamp set called "Wetlands".

Thursday 5 October 2017

Get Well Card.

This has to be my favourite card today.. probably because I can sympathize with this poorly mouse.
 This card doesn't need a sentiment.... I think the image says it all.
 It's a wonderful image by House Mouse and I enjoyed colouring this one.

Retirement Card

Another Lili of the valley  digital stamp. I think this card would make a great retirement card for a guy.
As always the image  was coloured with Copic markers.

Harry's Card.


Just a quickie card created with a
Lili of the valley digital stamp.

This card is off to a young man who will be celebrating his birthday this  month.
 I printed off the image onto whisper white card stock and coloured  the image with Copic markers and mounted onto some retired DSP

Staching through the snow

I have been playing  with this set again.
This time I have used the Serene Snowflake stamp set  with white craft ink to create a background for the Santa image.


Birthday Blooms.

I am always using mirri card to mount my die cut images, but I tend to use the positive rather than the negative.

This time I decided to use the negative. Well... it survived going through my big shot  with it's very cut up and warped cutting plates, so I decided to use it as the background for the birthday blooms stamp.

I mounted the image onto black card stock.
I decided to hold off on adding a sentiment for now.  As I don't know what occasion this car will be used for.
The stamp set is called birthday blooms, but you can use it for pretty much any occasion and it's still available from S.U.
I coloured the image with copic markers.

Evie's Birthday Card.

Today's card is for a young lady who will be celebrating her 4th birthday later this week.
I used the now retired "Styling Girl" stamp set  from stampin' up!
 I coloured the image with Copic markers.

I think almost everything I used on this card is retired.

The Polka dot background was created using the retired  S.U Polka dot background stamp along Almost Amethyst ink pad stamped onto whisper white card stock.
All mounted onto Almost Amethyst card stock..also retired.
.
The dies I used to cut out the letters are an early set of alphabet dies that S.U sold sometime ago and are no longer available. 
As a hobby demo I don't tend to sell my retired sets as so many demonstrators do. I bought them because I liked them and every now again I 'll dig out the older stuff and create something new, as I have today. 

Sunday 27 August 2017

Watering can and Robin.

 I had some money given to me out for my birthday,   So Hubby took me to a  little craft shop in Farnborough another in Lyndhurst in the New Forest to spend my dosh.
 I found this this watering can and robin stamp in farnborough and the Sue Wilson  embossing folder in Lyndhurst.
I also found a lot more stuff  in the Lyndhurst shop that I bought but haven't made much with... yet.

Christmas parcel card

Hubby said he didn't like this card. so I shared it with a card making group on Facebook with the title Hubby doesn't like this one.

The response it got was amazing.  Every comment was positive and some were hysterical.  I laughed my socks off when I read them.    I even shared them with Hubby.  Luckily he took it all in his stride and laughed along with me.

I used the Sue Wilson Swirly Vine die for the background.

 The parcel stamp is a very old stamp  I have no idea where it came from.
This card would work as a  Birthday or Christmas card  depending on the colour it's made in.

Handmade Christmas card


Another Lili of the valley digital stamp. Don't let the digital bit put you off , they also do rubber versions of most, if not all of their stamps.

This is my first attempted at colouring this image. I can't say I enjoyed colouring all that night sky blue. But now I have done it once,  I have come up with some other ideas to conserve my ink.  I just have to try it out before I share.

Snow Globe card

The di e used for this snow globe card is another Sue Wilson  die, called snow globe, surprisingly.
Now I have to say I love snow globes but I am not really sure about the ring around what would be a glass ball on the real thing.
 I am planning to make one with out the ring around the globe to see what that looks like.
The image I used for the centre is another Lili of the valley image.  A digital image again.
The beauty of the digital image is that they can be re sized. I  made this one smaller so that it would fit in the snow globe die.

 I  am wishing now,  I had bought the treat cups that go with the snow globe die... I could have really gone to town with this one.   Think I may have order some,, he he ..... Shhhh.. don't tell  hubby.
Again I have used the retire  wheel stamp from S.U  and the white craft ink to creat this black and white background.

Christmas Jumper card

This is another lili of the valley image. It's a digital image  I purchased from the website.
I don't buy many digital stamps, I am always afraid that I will lose all my images if somethhing went wrong with my PC and it's a very old PC,  so the chance of that are very high.

 I thought this was a great image and it  reminded me of my son's reaction to some his Christmas presents over the years.  Not that I have ever bought him a Christmas jumper. The image as always was coloured with Copic markers. The background was created using a wheel stamp and white craft ink.


Those Rats Again.

I know,  I keep calling the House Mouse images rats but to me they look more like rats. Probably because the tail lacks hair like mice have.
I prefer to colour the tail the same colour as the body rather than the flesh colour most people tend to use.
Other than that, these images are really cute.
I like this image as it would also be suitable for a birthday card as well as a Christmas card.  here I have used an old S.U wheel stamp with white craft ink to create the background.  The image was coloured with Copic markers. the sentiment is from a retired S.U set.

Nut Cracker Cards

Other than making a tag with this stamp  I haven't actually done anything with this stamp until last week. here are two cards using the Nut Cracker stamp from the "Staching through the snow" stamp set and the mustache die,
 The background  was created with a wheel stamp that has been retired so long I can't remember what is  called. I used white craft ink on the wheel stamp and rolled it diagonally across the card stock.  By stamping diagonally across the card means it doesn't show very much if your rolling isn't quite straight or the spacing between rows isn't even.
The sentiments on these cards are from another retired S.U set  it's called Greeting of the Season or Seasonal Greetings.
Both images were coloured with Copic Markers.

Staching through the snow

I know I promised to share my big project with you next, but it's taking me sometime to type it all up and upload the photos, so I am sharing a few Christmas cards I've been making.

 This is a quick Christmas card  made using the Sue Wilson Swirly Vine background die  and the retired  S.U stamp sets " staching through the snow.


The sentiment is from another retire  S.U set called Riveting.
I used Cherry Cobbler  and Whisper White card stock,  both from S.U.
I coloured the Santa image using Copic markers.


Thursday 10 August 2017

Hogs and Kisses

I admit this is not the most exciting card or is it elaborate card I have ever posted and I am wondering if it is worthy of a spot on my blog.
I guess I was thinking,   less is more  while working on this one or maybe I 'd just lost my mojo.

I used the new stamp set from S.U. called "This little piggy" to create this card.

I coloured the imaged using Copic Markers and mounted it onto cardstock layer which I had stitched together using a zigzag stitch on my sewing machine.


My next post will be very long,  the project is very elaborate and I will probably bore you all senseless with my drivel on how  long it has taken and the how
project was created  That should make up for this rather under whelming card.

Howzat!


This is the last of  my
Lili  of the Valley digital image cards ....for today anyway.
  
This one I have made for a cricket fan.

Again I have use Copic mark to colour this image.


There is no ball on this image.
I added a flat back self adhesive pearl that I had  painted  with alcohol inks to make it look like a cricket ball.  
The sentiment for this Card is from a retired S.U. set called Riveting.