
I can't resist posting this a little earlier than I had intended.
Every year there is an egg decorating competition at for staff at work. I was politely told some years ago I wasn't allowed to enter as it was thought I would win every year.
I was never sure if this was a serious or a joke, so in all of my years there, I have only ever entered this competition once...... and funnily enough I won.
This year the theme is book characters.
I was in two minds whether to enter or not.
But at lunchtime today I thought blow it,
I will enter and then set about boiling some eggs.
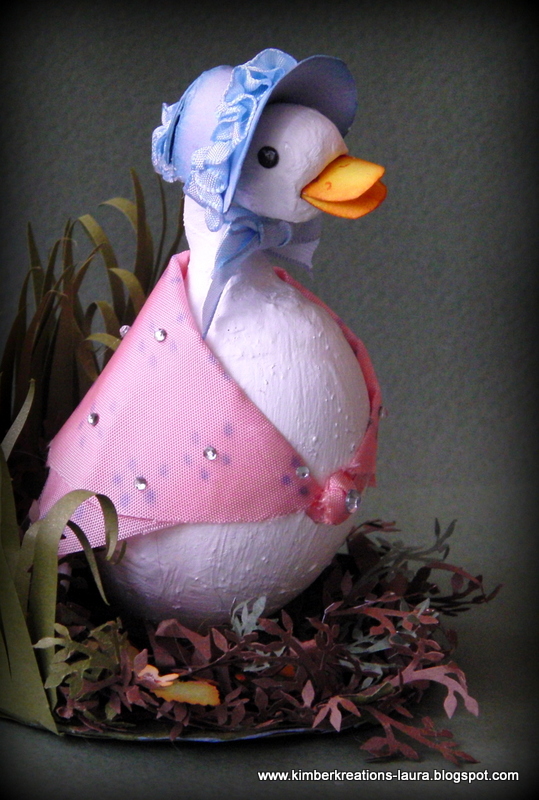
I really wanted to have ago at turning an egg into Jemima Puddle Duck.
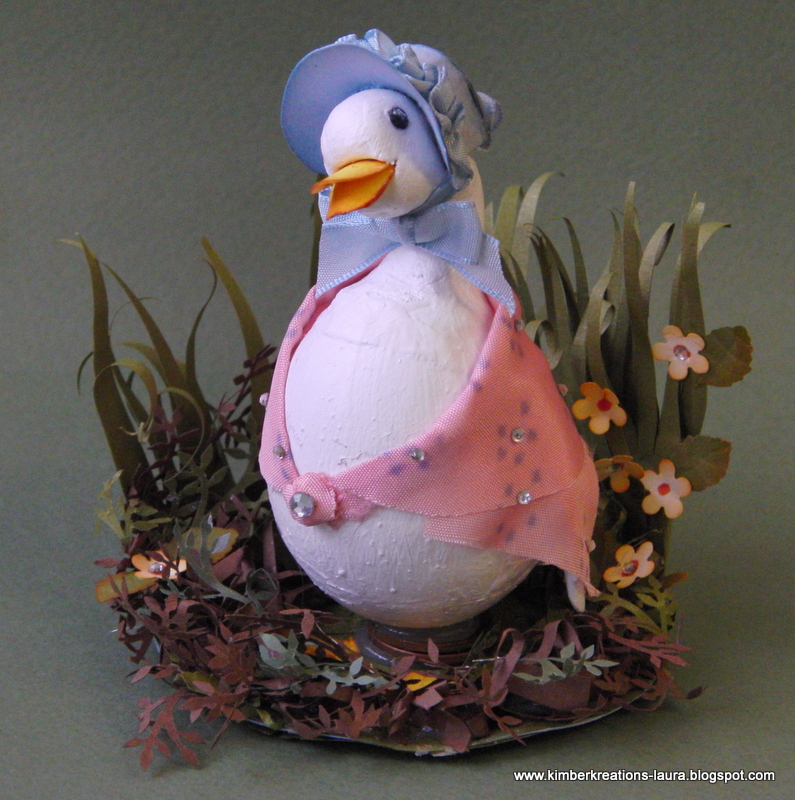
And here she is...
 Having cooked half a dozen eggs and while the eggs were still hot, I moulded some air dry clay into the shape of the neck and head of a duck and a pair of wings. I smoothed the base of the neck as best I could onto the hot egg. Then I positioned the wings and blended the top of the wings into the base of the back of the neck. Surprisingly, No glue was needed. The hot egg also helped the air dry clay to set quicker.
I made a slot in the head for the beak to slide into later. I also folded a small piece of scrap card and wedged it between the chin and the chest to support the head while the clay was drying. As I wanted the head slightly cocked to one side, not drooping on her chest.
At this point lunchtime was over so I hot footed it back to work.
On my return home I painted the egg and the clay white and allowed it to dry while I set about making the bonnet from blue card and ribbon.
 I used a large bead about the same size as the ducks head for the fittings to prevent squashing the head.
The beak was made using the five petal flower punch. I punched out the flower then cut two of the petal off and folded in half and trimmed away the points off the petals.
For the eyes I punched two tiny black circles highlighted them with white paint and added a drop of crystal effects to each circle and allowed them to dry.
For the webbed feet, I punched two flowers using the boho punch. I only needed three petals for each foot so I cut away the excess petals. I lightly sponged the edge of the beak and feet with pumpkin pie ink, curved the beak slightly and folded the feet to give the impression of ridges in the feet. The ruffled ribbon was created by running a line of machine stitching up the center of the ribbon. I gathered it by pulling the bobbin thread until my ruffle was the desired length.
Using a hot glue gun, I ran a line of glue at the base of the bonnets brim and quickly applied the ruffle. I did the same at for the ruffle at the back of the bonnet only using a much shorter length of ribbon.
Now you'd think the scarf would be a piece of cake to drape on the egg and getting it to look the way it does the pictures..... Think again, there is no way you can get a piece of fabric to wrap round a duck the way it does in these books.
I ended up cutting the fabric into two squares and a rectangle and sticking the pieces together with snail adhesive to achieve the look and even then it wasn't perfect. I come close to cursing Beatrix Potter for this, but then I remembered all my trips to the library as a child to get her books out. I loved those books. I couldn't wait to finish one book so I could go back and get the next one. Fortunately for me the library was only two streets away from where I lived, so I was a frequent visitor.
 Enough of memory lane and back to this egg, once the scarf pieces were stuck in position I ironed it and the stamped rain drops all over it and to add a little bling, I stuck some very tiny sparkles in amongst the rain drops.
To get Jemima to stand,.. I used a hot glue gun and stuck two 1 pieces together and the glued them to the base of her nest, then applied a large dollop of hot glue on top of the pennies and placed her on top of the glue. By doing this it raised the egg off the base giving the impression of legs.
NB. Her feet, I stuck to the base NOT on the egg.
To make the base I cut a circle about 4" across and ran a thick line of glue about 1/2 an inch away from the edge all the way round and began sticking the screwed up waste paper from cutting the the reeds pushing it lightly into the glue.
 I used a selection of punches, a tiny leaf, a sprig of leaves punched out in different shades of browns and green and tiny flowers of cream.
The whole project took about three hours not including drying time.
Well the competition is on Thursday I'll let you know how Jemima does gets on. There have been some superb entries over the years so she could be up against some stiff competition. Keeping fingers crossed for a win, but having said that,
I really don't need to win a chocolate Easter egg As they say ...............Chocolate makes my clothes shrink. :)
Happy Easter one and all.
Nite x
3 comments:
This really is lovely Laura, may the best girl win! Good luck!
Oh.My.Gosh!! This is amazing!! Really, that's the best I can come up with, because I'm speechless! Your work is amazing, Laura. I'm off to get lost in your other creations now :)
WOW!!!! I am in seventh heaven . I can now after several years reply to The comments left on my blog. Thank you Lesley and Deborah for your Lovely comments on this post.
Post a Comment